 You have a three or four year old Mac that’s not being used much any more. Perhaps you’ve already repurposed that machine as a media center. What could you do to maximize that aging machine’s use and get the most value out of it?
Why not use it as a Time Machine server? So that it quietly backs up all your Macs in the house while you watch your favorite movie? Yes it needs an OS X server, but since OS X server is only $20, it’s a no-brainer to install on your media center mac to get more use out of it.
What you’ll need
- A Mac connected to your home network.
- A copy of OS X Server.
- An external hard drive (optional)
Setting up the Time Machine server
- Install OS X server on the server machine.
- Open the Server application then select Time Machine and activate it.
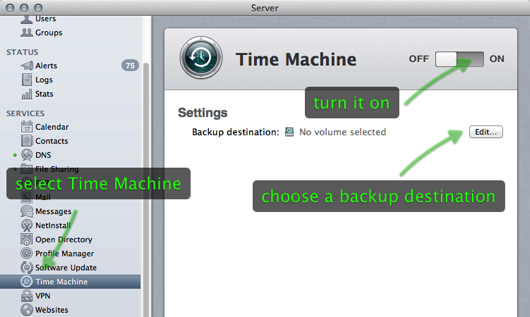
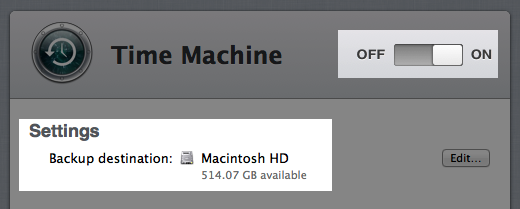
- Select the destination volume. It’s better to use an external drive for this since your repurposing an old machine after all, one that is more likely to break. If that machine finally gives up it’s ghost, your backup data will be safe inside that external drive.
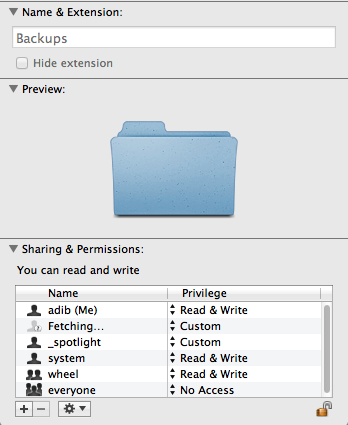
- Setup the backup folder permission and grant read/write to all users that need to backup their data. If you selected the server’s internal drive as the backup drive, this will be in “
/Shared Items/Backups“.
Setting up client computers
You’ll need to configure each Mac and add the server as an additional Time Machine backup drive. It’s good practice to keep multiple backups and retain a directly-attached drive (like USB, Firewire, or Thunderbolt) in addition to a network drive. Besides Time Machine backups over Wi-Fi aren’t very reliable in the first place.
- Open Time Machine preferences (that’s in System Preferences).
- Click on Add or Remove Backup Disk.
- Select your server’s backup disk. You might want to tick the “Encrypt Backups” checkbox so that no one else can see your backups.
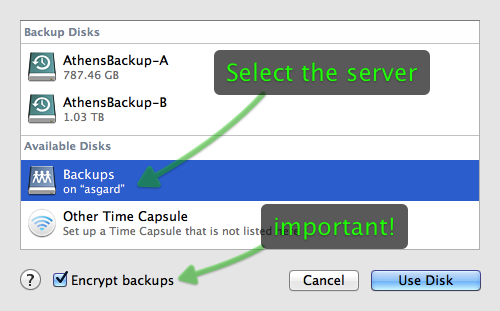
- You might be prompted to enter a user name and password to access the server. Enter a user account that is valid on the server. You might want each family member to have their own user account in the server.
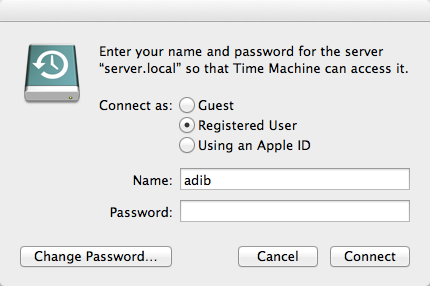
- If you enabled the “Encrypt Backups” option, you will be prompted for a password to use with your backups. Enter a password and keep it safe as you’ll need this when you want to restore your backups in the future. Note that this is not the same as a user account password.
So there you have it, a Time Machine server. Enjoy!
